
Unlike drywall’s fluid density, plaster walls manifest fluctuations on the backside of the surface. Stud finders designed to sense a change in density in the wall will not do the job on lath and plaster.

Laths have horizontal fastening on vertical studs, with wire mesh added and two seams of plaster applied over the strips. The lath and plaster construction makes it challenging to pinpoint the studs to mount heavy objects like shelves and electronics.
A multi-scanner and metal detecting stud finder that pegs down nails that fix the lath to a stud instead of detecting density will hit the “sweet” spot. A simple wire scan or other techniques can help you pinpoint the studs or joists in plaster walls or ceilings.
8 Things To Consider about How to Find Studs in Plaster Wall:
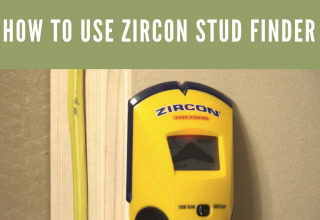
1. Metal Scanners Go Like Clockwork
Top-class multi-scanner stud detectors with a metal scanning mode will not fall prey to red herrings due to changes in density along the backside of the wall. A metal sensor or dedicated metal scan mode helps you pinpoint tiny nails and tacks that fasten all pieces of wood lath to studs.
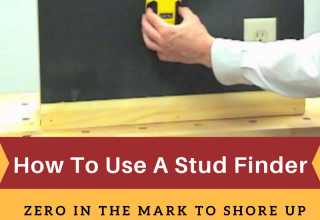
- Slide the device horizontally along the wall while it’s activated or toggled on. The scanner will produce light or sound beep to help you highlight on the surface the exact spot.
- Decreases the sensitivity on the scanner negligibly, start at one nail and probe straight up the wall. If it reports metal at a pattern, it hits a chain of nails indicating a stud.
2. Architrave or Attic Scouring for Studs
To ascertain joist and stud region, mount on the attic and give rafters a walk-through but not in-between to measure up the first joist’s location.
Also estimate the distance spacing joists from the midpoint of each joist.
Transfer the surveying to the room’s wall, measuring from the same column where you estimated in the attic. Begin at the corner and highlight the wall along the room in 16” or 24” intervals as indicated in the attic.
Common balloon framed houses install ceiling joists and studs 16” or 24” on midpoint. Joists usually hinge directly onto studs above the wall’s top plate.
3. Live AC Electrical Wire Probing
Wire scanning provides the oldest of zeroing in studs beneath plaster walls and joists in ceilings.
To forage, cut and even out a coat hanger using wire cutters. Measure exactly 3 ½” from one edge to bend the piece at a 90 degrees angle or L shape.
Examine the baseboard and crown molding minutely for noticeable nails as a clue leading to studs or ceiling joists. You can tap the wall gently for a thud but not a hollow sound.
Dip the crooked end of the hanger into the crevice, poking it through beyond the 90 degrees bend. Spin it clockwise, if the hanger runs into a solid structure, you have found a stud.
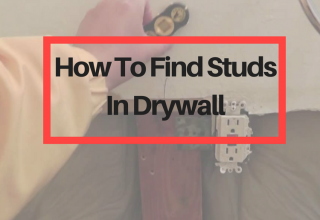
4. Trace the Electrical Units
- Electrical units for outlets or light switches nailed directly to studs offer more vivid cues.
- Note some boxes may not fasten to studs but freely float. Check on either side of the unit to identify a stud.
- To peer inside and know the side where a stud lies, pull out the cover and switch off the breaker.
- If you uncover the stud, you can use a tape to measure 16” to hone in the most adjacent. Some houses have a framing spacing of 24” or unique distances making the method unsuitable in some cases. Try other tricks to hit the mark.
5. Acoustic Thumping-Playing It By Ear
- You can knock across the wall with your knuckle gently to detect sound differences accurately.
- When you tap on wall seams with no stud, you will hear a resonance generated by the hollow space beneath.
- If your knuckle hits the mark containing a stud, the sound changes to a dull thunk pitch. Move across the wall and check for a pattern to manifest itself to sense the stud spacing. Skip the area where you detect a hollow and vibrating sound, studs generate a duller, less silent and feel solid.
- It’s a tried and tested trick but not full-proof or a litmus test as you can go close but no cigar.
7. Use A Magnet
- A magnet will hit the spot and detect the presence of studs in a straightforward way. Tool up with the most attractive magnet and attach a portion of dental floss or strand around it.
- Suspend the magnet along the wall and move it along in a snail’s pace horizontally.
- Occasionally, the magnet will attach to the wall for some time on a stud’s location. A strong magnet will cut it but not those floppy pizza versions.
- You go over with a bang as the wood lath fastens on studs, the magnet inches closer to those nails.
8. How to Mount Heavy Items Onto Plaster Walls Without Studs
Mark the regions of all of the bracket mounting spaces onto the wall; use a level to straighten the brackets.
Carve out a tiny pilot crevice using a wood-boring bit into each highlight made via the mounting crevices for every bracket. The pilot hole deters the plaster from fracturing and makes drilling other openings easier.
Drill a bigger hole to the diameter marked on the package tag for the dimension of the toggle bolt.
Insert the toggle bolt via every mounting opening in the shelf bracket and thread its wings against the bolts roughly 1/4”. Fold up the wings evenly onto the bolts and dip the edges into openings in the wall, pressing in the bolts until the wings clean-sweep the lining and snap open. Pull the tip of the bolt backwards for a firmer grip and using a screwdriver or drill to fasten the bolt.
Tips and Tricks for Stud-Finding in Plaster Walls
- Plaster walls have nailing strips of slim wood lath, spaced ¼” apart, horizontally along the vertical studs
- Only the sturdier, thicker wood studs beneath the considerably light, thin plaster layer can endure weighed down plasma TV, electronics and shelves
- Timber studs lie vertically with a spacing of 450mm or 600mm away. You can search for plasterboard fixed and screwed onto the timber studs
- If you want to use two mounting holes and can’t find another stud, substitute it with a plasterboard anchor at the reinforcing point for firm and steady support
- Insert a needle or pin and gently whack it into the wall roughly 10mm using a hammer, if you hit a hard surface, you’ve found a target
Final Verdict
Most do-it-yourselfers have raveled out full-proof ways on How to Find Studs in Plaster Wall. Unsheathed shelving or fixtures cleverly revolutionize the functional and aesthetic flair of your plasterboard house. To mount items securely, you should fix directly into the studs in the plasterboard wall.
You can hit the mark with old tricks such as gently tapping to detect a change in pitch, locating electrical outlets, or threading through a hanger. Plaster walls have a building technique that makes it almost insuperable to drill across and cracks easily. You have to narrow down studs for heavy shelving or mounting.


Leave a Reply