
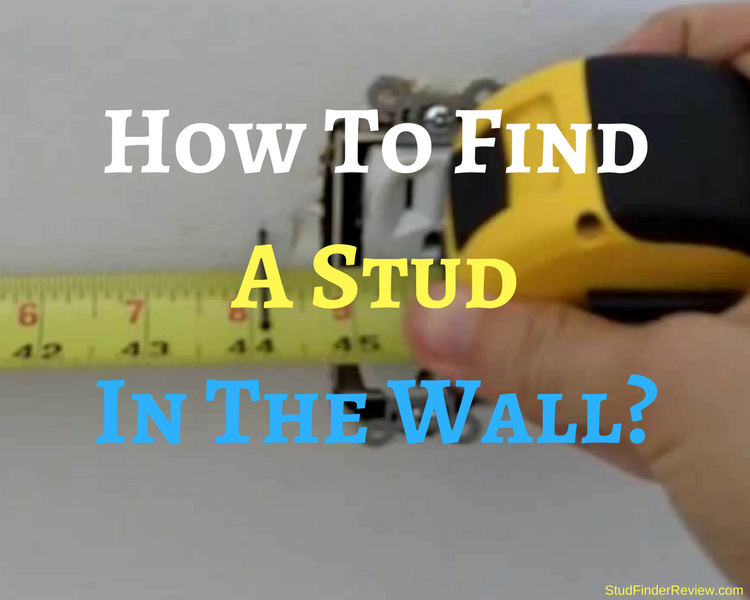
 Grappling with the topic how to find a stud in the wall? Studs refer to boards or beams ensconced in walls as framing elements shoring up the framework. You need an acid test or high-precision stud finder to mark and hit the bull’s eye.
To avoid the needle in the haystack hunt or close-but-no-cigar methods, homeowners well-versed with the house plan and construction locate studs through logic, tool-free. But all other techniques pale in comparison to a stud finder as it will range in and hit the mark with pinpoint-precision.
Locating studs paves the way for decorations or home improvement. Without military precision, you risk damaging expensive components as you knock through walls, electrocution, and irreparable ruin.
Things To Consider | How To Find A stud in the wall?
1. Understanding House Structures
Every house differs in architectural design and edifice though they all share similarities. Modern stick-framed buildings erected after the 1920s or so contain 2×4 or 2×6 studs. Find below tips on the framing of walls.
The typical spacing of studs clocks in the neighborhood of 16”-to-24” on center (which indicates the distance from the midpoint of one stud to the adjacent). 16” takes the lion’s share of the dimensions.
Studs also exist on the sides of windows or doors, but their spacing depends on the floor plan and with varying spacing dimensions.
Electrical switches or outlets attach to a stud on either side.
You may also run into trim like baseboards, and crown molding nailed to studs
2. Zeroing In Studs Tool-Free
Use a battery or electric powered lamp to cast a penlight at a sharp inclination against the wall seeking bumps and dimples in the lining. Irregularities stem from nails shoring up the lining of the wall to the studs, and this makes them vivid underneath.
Scour the baseboard for outlets and nails. Nails fix baseboards to studs, and outlets bind to their edges. Electrical switches typically mount on the edges of studs at the top of walls.
Measure 16” from the studs to determine the site of the adjacent one.
Hammer a small nail into the wall where you suspect to have found the stud. Check if nailing bite into the wood beneath the plaster and drywall, extract it and slip in wire into the crevice. A quick twist of the metal cord will home in the stud allowing you to detect its location.
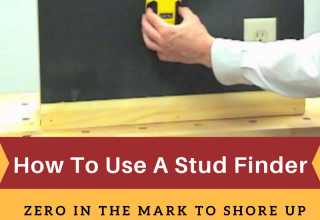
3. Finding Studs Using Electronic Stud Finders
Estimate the height you want to ferret out a stud. You’ll get clues from the projected height of the fastener for securely the item you want to mount.
If your device lacks auto-calibration, do it manually. Do this by holding it flat against the wall with no stud and turning it on. The stud finder signals when calibrated or if you need to reposition it and try again.
Place the stud finder against the wall moving it along the lining at the mounting distance of the fastener; edge-finders alert you on the presence of stud edges. Measure and indicate the midpoint between the sides to know the center. Center-detecting models inform you when they hit the center.
Mark several points on the target stud and pinpoint adjoining studs to confirm its presence with certainty.
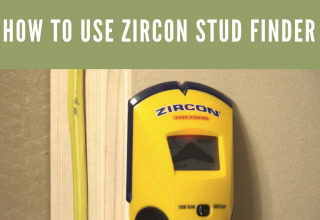
4. How To Use A Magnetic STUD Finder & Pinpoint the Midpoint of A Stud
- Magnetic-driven stud-finders work by narrowing down steel nails or screws used to shore up drywall to studs.
- Notch-bottomed stud finders allow easy marking once you isolate studs.
- START by placing the magnetic stud finder on the surface of the wall where you will mount or attach. Its attracted to the stud, joist or plumbing.
- Grab a hammer and a nail; knock through to feel wood and move further to identify the center of the suspected stud.
- Once you find the center, use a tape to measure 16 inches to the center of the adjacent stud.
- Use a lever to mark the center of the stud where you’ll hinge on your installation.
5. Hidden Keys to Navigate & Nail Down Studs
Contractors have mastered the art of locating the studs tool-less.
- Knock the wall vigorously and listen for a variation in the tone of the tapping, then hammering through a thin nail to ascertain the stud’s location.
- You can also turn on an electric razor and pull the butt-end along the wall, noting the differences in tone as you reposition from its cavity to the stud.
- Scour the wood baseboard trim for nail crevices and filled holes next to its top edge. It’s the point where nails attach the baseboard trim to studs. Baseboard nails do not penetrate into the drywall but only studs.
- Electrical outlets have studs along the edges of the unit. The actual center lies ¾’’ from the margin of the box.
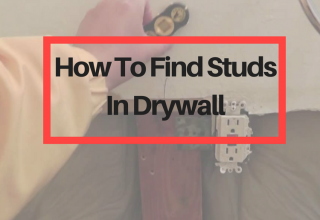
6. Construction Clues For Drywall
- Walls also prop up drywall or interior woodwork while they envelope electrical outlets and heating supply/return pipes, you can find studs adjacently.
- Drywall also provides the missing links as their edges fastened over studs leave shadows of a tape joint, drywall nail and screw. Use a torch or lamp to cast light across the lining at a very straightened angle. It will make vivid the outline of the drywall joint and fastener nestled at a stud.
- Find one, measure over to the side in 16” increments to pinpoint the edge or midpoint of neighboring studs. 16” on the center but spacing varies due to windows and doors.
7. The Litmus Test To Hit the Mark
Once you sense the location of a stud’s edge, you may still want to run a reliable and conclusive test before you drive through a sizable fastener into the middle of the wall.
- You can detect the exact location using a tiny finishing nail hammered just on top of the baseboard molding, via the drywall into the stud.
- An incredibly small nail crevice becomes shrouded, and you can verify the location of the stud once the nail pokes into the wood.
- Remember to cover a half-inch of the drywall before you hit the stud.
- Also, bear in mind that 2×4 measure 2” by 4” in older buildings. The hardwood offers sturdiness, and the studs have a solid-as-rock structure.
8. Tips & Precautions for Finding A Stud
- Houses’ frames have wall studs typically 16” or 24” apart. If you start from one corner and measure out 16” and don’t detect a stud, then one should lie at 24”.
- Search for electrical switches or outlets. They mount on the edges of studs paving the way for a successful probe.
- You must avoid drilling into the Live or uncovered wires beneath the wall. Most electrical wires run horizontally 2 feet above the floor or proximately next to the ceiling.
- Cross-check local building codes and practices for installing electrical wiring for certainty.
- Beware of false positives and negatives, mainly where wires lie behind earthed metal when using automatic navigation devices.
Final Verdict
The how to find a stud in the wall guide equips you with another fresh pair of eyes and a bag of tricks to avoid hard sledding. You can hang up a portrait on the wall or install a book shell securely by nailing it directly to studs buried in the wall due to firm and steady support.
If you hammer a bulky and heavy structure on wallboard and plaster, it will tumble with a thud when fasteners loosen.
In a technology-driven era, you won’t need sound hearing and the old contractors’ tricks as you may go close-but-no-cigar or even miss the point. Advanced stud finders will do the job by sensing density fluctuations in a wall with settings that improve precision.


Leave a Reply